How to Pour a Concrete Slab? might sound like a daunting task, especially if you’re a beginner, but with the right tools and some careful planning, you can complete the job yourself. Whether you’re creating a foundation for a shed, patio, or driveway, this DIY project can save you money and give you a sense of accomplishment. In this guide, we’ll walk you through the essential steps for pouring a concrete slab and provide helpful tips to ensure a smooth and durable finish.
Why Pouring a Concrete Slab Is a Great DIY Project
Concrete slabs are essential for creating stable foundations for various structures, from outdoor spaces to smaller buildings. They provide support, durability, and protection against moisture. As a beginner DIYer, learning how to pour a concrete slab will give you valuable experience and expand your skill set. Plus, it’s a cost-effective way to improve your property!
What You’ll Need to Pour a Concrete Slab
Before you get started, it’s essential to gather the necessary tools and materials. Here’s a list of items you’ll need to pour a concrete slab:
Tools
- Shovel (for digging the area)
- Wheelbarrow or concrete mixer (for mixing the concrete)
- Concrete rake (for spreading and leveling the concrete)
- Trowel (for smoothing the surface)
- Level (to ensure the slab is even)
- Wooden stakes (for marking the perimeter)
- Measuring tape (to measure the dimensions of the slab)
- Masonry brush (for finishing)
- Plastic sheeting (to cover the slab while curing)
Materials
- Concrete mix (pre-mixed or ready-to-use)
- Gravel or crushed stone (for the base layer)
- Reinforcement bars (rebar) or wire mesh (for added strength)
- Form boards (to create the mold for the slab)
Step 1: Plan and Measure the Area
The first step in pouring a concrete slab is to measure and mark the area where you’ll be working. Decide on the dimensions of the slab (length, width, and depth). For most DIY projects, a 4-inch thick slab is common, but this can vary depending on the load it needs to bear.
- Mark the corners of your slab using stakes and string.
- Double-check measurements to make sure the slab is square. Use a 3-4-5 triangle method (a right-angle triangle) to check if the corners are square.
Step 2: Excavate the Area
Once the area is marked, you’ll need to remove the soil to prepare for the concrete. Depending on the slab’s thickness, you may need to dig down 4–6 inches.
- Remove grass, roots, and debris from the area.
- Use a shovel or pickaxe to loosen the soil and create a flat, level surface.
To improve drainage and provide a stable base for the concrete, add a layer of gravel or crushed stone to the excavated area. This should be about 2–3 inches deep and will also prevent the concrete from cracking due to shifting soil.
Step 3: Build the Form
To contain the concrete while it’s curing, you’ll need to build a form (a mold) around the perimeter of your slab. This is done using wooden boards or pre-made form boards.
- Set up the form boards to match the dimensions of your slab.
- Ensure the boards are level and square by checking them with a spirit level and measuring tape.
- Secure the boards with stakes driven into the ground to hold the form in place.
For larger slabs, consider using rebar or wire mesh inside the form to reinforce the concrete.
Step 4: Mix the Concrete
You can either mix your own concrete or purchase ready-mix concrete from a local supplier. If you’re mixing your own, follow the manufacturer’s instructions on the bag for the right proportions of water and concrete mix.
- Mix small batches in a wheelbarrow or a concrete mixer until you achieve a thick, pancake batter-like consistency.
- Avoid adding too much water, as this can weaken the concrete and cause cracking.
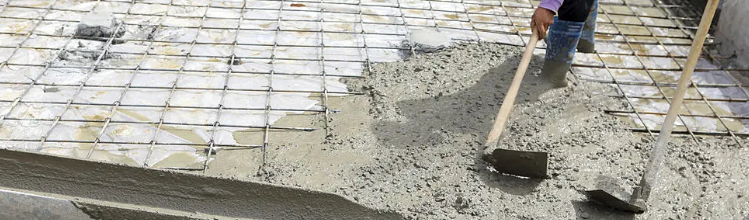
Step 5: Pour the Concrete
Now that the form is in place and the concrete is mixed, it’s time to pour. Start pouring the concrete into one corner of the form and work your way across the slab.
- Use a shovel or concrete rake to spread the concrete evenly throughout the form.
- Fill the form completely, making sure there are no air pockets. Gently tap the form with a hammer to release any trapped air.
Tip: If you’re working with a larger slab, consider having a friend assist you to make the process faster and smoother. or check our concrete leveling erie pa service.
Step 6: Level and Smooth the Surface
Once the slab is filled, it’s time to level and smooth the surface. Use a straightedge or a long board to screed the concrete, pulling it across the surface to remove any excess concrete and ensure it’s level with the top of the form.
- After screeding, use a trowel to smooth the edges and surface of the slab.
- Wet a masonry brush to finish the surface with a smooth or textured finish (depending on your preference).
Step 7: Allow the Concrete to Cure
Curing is a crucial step that ensures your concrete slab reaches its full strength. Concrete typically takes about 24–48 hours to set, but it can take up to 28 days to fully cure.
- Cover the slab with plastic sheeting to retain moisture and prevent rapid drying.
- Keep the slab moist during the curing period, especially in hot weather, by misting it with water every few days.
Step 8: Remove the Forms
Once the slab is fully cured, you can remove the forms. Carefully pull out the stakes and boards, and clean up the area around the slab.if you think hard talk to our concrete contractors in erie pa.
How to Pour a Concrete Slab: Final Thoughts
Pouring a concrete slab may seem like a big job, but by following this simple step-by-step guide, even beginners can achieve great results. Be patient with the process, and remember that preparation is key to success. With the right tools, materials, and care, you’ll have a strong, durable slab ready for whatever project you have in mind.
If you’re still unsure about some steps or want to add some unique touches, there are plenty of online resources and tutorials available. With practice, you’ll feel more confident tackling concrete projects around your home! also you can check our duct cleaning service in usa.